Blog moved/verhuisd!

2017/08/18

If you are reading this, then it means you’ve arrived at my old blog which was hosted bij WordPress.com. I’ve moved my blog to my own server: https://blog.enricoklein.nl/


Als je dit leest dan ben je op mijn oude wordpress.com blog terecht gekomen, ik heb het blog verhuisd naar mijn eigen server: https://blog.enricoklein.nl/


Cross-Forest Kerberos / SPNEGO issues

2015/12/21

Recently I was confronted with an interesting Kerberos authentication issue, so I thought why not share it for prosperity’s sake.

First a bit of background on the architecture…

We were working on migrating a fairly large customer to our Online Workspace environment. The customer had separate account domains for development, testing, acceptance and production (where acceptance and production were part of the same forest, and the other two domains were separate forests) as well as separate resource domains (all single domain forests) for DTAP. The resource forests were all hosted and maintained at KPN’s Utility Hosting, the account domains were managed by the customer itself.

We setup 1-way Incoming Forest Trusts between our AD and the 4 resource forests, but unfortunately the customer’s AD admin insisted on External Trusts to the acceptance and production domains.


When the first users were migrated to our AD and the users started testing with their applications they noticed that Single Sign-On (SSO) wasn’t working for their SAP applications. When using the sapGUI it worked fine, but connecting to the web applications resulted in a login page.

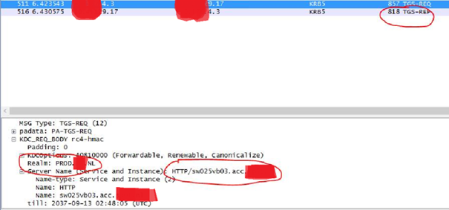
The web application was configured to use Simple Protected Negotiation (SPNEGO) for SSO. After reproducing the issue while running a Wireshark trace I noticed the client was requesting a Kerberos TGS ticket for a different ServicePrincipalName (SPN) than we put in the address bar:

Doing a DNS lookup for the URL revealed they had configured it as a CNAME record instead of an A-record, so when the client did a DNS query for the FQDN in the url, it would request a TGS ticket for the real FQDN instead. No biggy, as long as there is a corresponding SPN configured on the account hosting the application.

As you can see in the packet trace above, the client (x.x.4.3) is contacting the local DC (x.x.1.2), receives a referral ticket and contacts the DC in the acceptance resource domain (x.y.1.13) where the server resides and gets a valid Kerberos ticket. So from a Kerberos point of view it all works fine, because we have a Forest Trust connecting to the resource domains, our local AD has the Name Suffix Routing information for these domains (stored in the Trusted Domain Object or TDO) and is able to issue the appropriate referral tickets…however SSO wasn’t working and the user was still prompted for credentials.

After talking to the SAP administrator I learned that the application was running under a service account in de production account domain. (the reason why they configured it this way was probably because in the past they had also configured the trusts between account and resource domains as External Trusts and couldn’t get Kerberos working between the account and resource domains). So the website FQDN was created in DNS as a CNAME pointing to the server in the acceptance resource domain, but it was running under a user account in the production account domain. (are you still following me?)

I first tried adding an entry in the local HOSTS file pointing the website address directly to the server IP (hence bypassing the CNAME to A-record translation), as a result the client was now trying to request a TGS ticket for the right SPN, but our KDC wasn’t able to issue a referral ticket because it had no Name Suffix routing information for the account domains because of the External Trusts not fully supporting Kerberos authentication. If you would like to know more about this, I would really recommend reading this (6 part!) article: https://jorgequestforknowledge.wordpress.com/2011/09/14/kerberos-authentication-over-an-external-trust-is-it-possible-part-6/

Packet trace with altered HOSTS file :

(local KDC has no routing information for the name suffix, so returns ‘PRINCIPAL_UNKNOWN’ error)

Now there is one more thing I should mention: Even if the trust had been a Forest Trust this probably wouldn’t have worked since the website address falls within the namespace of the acceptance account domain, while running as a user from the production account domain, on a server in the acceptance resource domain. (it keeps amazing me how difficult some admins make this shit)

After reading through Jorge’s blog I decided to try the Kerberos Forest Search Order (KFSO) GPO. Since I wasn’t sure how setting this GPO on the KDC would affect name suffix routing over the existing Forest Trusts, I decided to configure it on the clients instead. Unfortunately, this didn’t do jack nor shit.


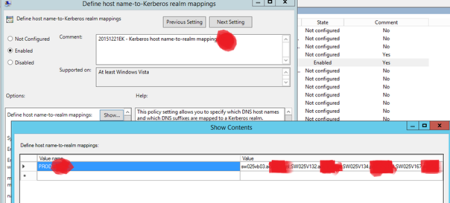
So I went through the other Kerberos settings in the GPO and noticed this one:


I couldn’t find much on this setting through Google, so I decided just to give it a try:

In our case we only needed to enable this for a hand full of servers so we added the list of individual servers to the specified realm, but if you need this to work for dozens of servers I would just enter the entire DNS suffix in there.

After configuring this GPO setting and doing a ‘gpupdate’ it worked! (well, at least after I removed the entry from the HOSTS file, because as it turned out they never configured the URL FQDN as a SPN, but only the server’s FQDN)

Voila, a valid Kerberos ticket:


And the packet trace shows that the client is sending the TGS request straight to the correct KDC:


Lessons learned:

  • Avoid using CNAME’s when configuring Kerberos
  • Avoid using External Trusts, if at all possible, always go for a Forest Trust
  • Keep shit simple! Publishing an application running on a server in Domain A, with a service account from Domain B and using the namespace from Domain C is, imho asking for trouble!
  • Enable Kerberos logging (in Windows 2012 R2 this is no longer enabled by reg_dword LogLevel=”1″, but instead in eventvwr under ‘Applications and Services Logs \ Microsoft \ Windows \ Security-kerberos’ right-click, enable)
  • Use wireshark (portable) and the builtin Kerberos filter.
  • Before reproducing or tracing always clear your existing Kerberos tickets with ‘klist purge’ command!


Cheers,

Enrico


Shovelhead 4-speed overhaul part #2

2015/10/12

Now that we have the primary drive components out of the way we can proceed with the removal of the inner primary housing. But before we can remove the inner housing we need to get some stuff out of the way.

First I disconnected the wires from the solenoid and got reminded that I had forgotten to disconnect and remove the battery. (dumbass!) So always start by disconnecting the battery! (I did disconnect the spark plug wires though 🙂 )

After disconnecting and removing the battery (we need it out of the way anyway to get better clearance when we need to remove the starter motor later on) I removed the solenoid from the primary housing. To get the starter gear lever and the starter shaft out, we need to unscrew the pivot bolt, that holds the the starter gear lever, from the top of the housing. This bolt can be quite tight and there is almost no room because of the oil tank….so if you hadn’t guessed by now…..time to drain the oil tank and remove it from the frame!

After draining the oil from the tank, I disconnected the oil feed and return lines, removed the nuts from the mounting studs and lifted the oil tank out of the frame. (inspect the mounting stud rubbers and order new ones if needed!)

With the oil tank out of the way I could remove the pivot bolt and take out the gear lever and starter shaft assembly.

Shovelhead solenoid plunger, starter gear lever and starter shaft assembly

The front inner mounting bolts for the primary are secured with a safety wire, after removing the steel wire, I removed the upper and lower bolt (the center bolt doesn’t go into the crankcase), then removed the 2 rear bolts and the front 2 allen head bolts on the outside of the housing. (which were metric bolts in my case, so I first had to get a set of metric allen keys :S)

But wait…I’m forgetting something…. The starter motor is still bolted to the back of the primary 🙂

After disconnecting the wires from the starter motor, (label them! Especially if all your wires are the same shade of black, like mine :S) removed the chrome bracket from the back of the starter motor on the right side of the bike. Now it was time to unscrew the 2 studs/bolts that run through the starter motor and into the starter shaft housing on the back of the primary. (carefully lift it out as a unit, make sure you don’t pull the starter motor apart!)

Now I was finally able to get the primary out of the way and get on with removal of the gearbox 🙂

Shovelhead with primary housing removed

As you can see from the picture I try to make a habit out of screwing the bolts back where they came from. This can save you a lot of trouble with the reassembly!

More to come in Part #3!


Shovelhead 4-speed overhaul part #1

2015/10/05

Until recently my 1982 Shovelhead didn’t leak a drop of oil. One of the main issues with these bikes (in regards to marking it’s territory) is a leaking primary, but mine was sealed great with the help of James Gaskets and some blue silicon. Another source for oil leakage is the oil seal on the mainshaft of the transmission. In my case this turned out to be the cause of my Shovel marking it’s territory. It started with a small drop every now and then but it got worse rather quick.

It can be difficult to pinpoint the exact source of the leakage, because the bottom of the engine, primary and tranny is often covered in lot’s of grease and dirt. So I started by cleaning the bottom of the engine and transmission with some brakecleaner, and the next morning I could clearly see the oil trail leading from behind the transmission sprocket to the bottom mounting bolts. Time to take it apart!

Before you can get the transmission out you need to get some stuff out of the way, the most obvious being the primary drive. After I drained the oil from the primary, I removed the primary cover and ran into the first challenge: the clutch.

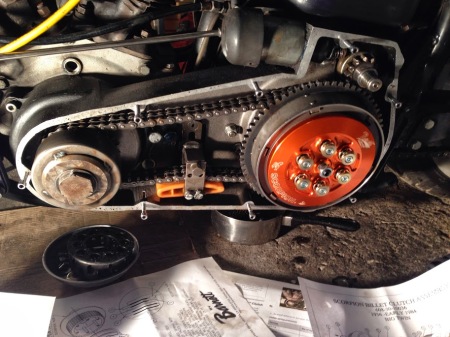
A few years ago I replaced my clutch with a Barnett Scorpion clutch (no more slipping!), but to get the clutch hub of the mainshaft I needed two specific tools from Barnett, a Scorpion Clutch Lock Plate and a Scorpion Clutch Hub Puller.

Barnett Clutch hub puller and lock plate

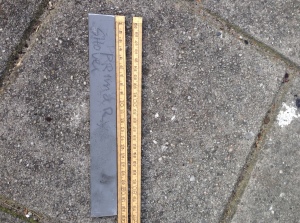
First thing was to get the clutch hub nut loose (left hand thread! so turn clockwise to loosen!). Before you can unscrew this nut you’ll need to lock both the primary and the clutch. I used a piece of steel bar and rounded both ends using a file, stuck this between the crankshaft sprocket and the clutch shell to prevent the primary from spinning. I then used the clutch locking plate to lock the inner clutch hub to the clutch outer shell. (if you have some old clutch plates lying around you could weld 2 together to make your own locking plate)

Shovelhead primary lock bar

The clutch hub nut can be very tight, so I heated it up first using a paint stripper and then, using a 1 1/8″ socket and a long steel rod over the wrench, I removed the nut. (I guess you could use an impact wrench too) Because the mainshaft is tapered, the clutch hub will be very tight, that’s why you need the puller. Be sure you screw the clutch nut back on the mainshaft for 5 or 6 turns and put a washer over the nut before you attach the puller. If you don’t, the puller center bolt will push against your clutch pushrod and you’ll brake shit. (trust me!)

Before you can remove the primary drive as a whole, you’ll need to remove the compensating sprocket from the crankshaft. This is normal right-hand thread and it takes a 1 1/2″ socket. I know some people use an impact wrench to remove the compensating sprocket, but I would personally recommend against that because there’s a risk of breaking loose the magnets on the rotor, and then you’ll have a whole new problem (especially if it goes unnoticed). Finally, loosen the primary chain tensioner and you can take out the complete primary drive.

Shovelhead with primary drive removed.

More in part #2!


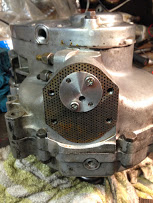
1957 BSA B31 Restoration

2013/11/12

For the last couple of months my brother and I have been working on his 1957 BSA B31 motorcycle. Approximately every Tuesday night we gather at his place to work on the bike. We started by removing the wheels to have new rims, spokes and tires fitted and are currently working on the engine. The cilinder has been bored to 400CC and we’re about to reassemble the engine. After that we still need to strip the frame and give it a new layer of paint, after that we’ll reassemble the bike and fit a new Amal MK1 Concentric carburetor to replace the Amal Monobloc.

You can watch the photo-blog here: https://plus.google.com/photos/105887025148501656794/albums/5908950495416198897

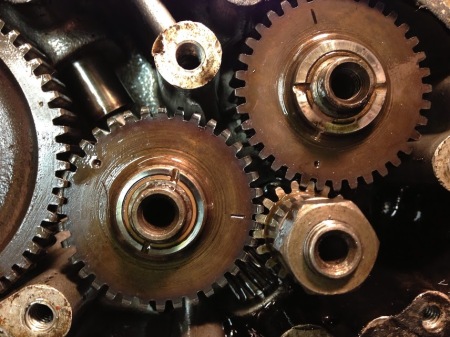
BSA B31 timing gears

BSA B31 timing gears

Update: 15-may-2014

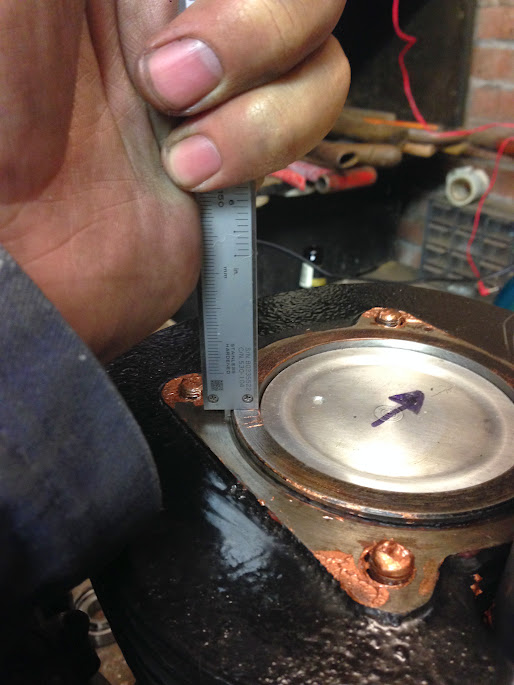
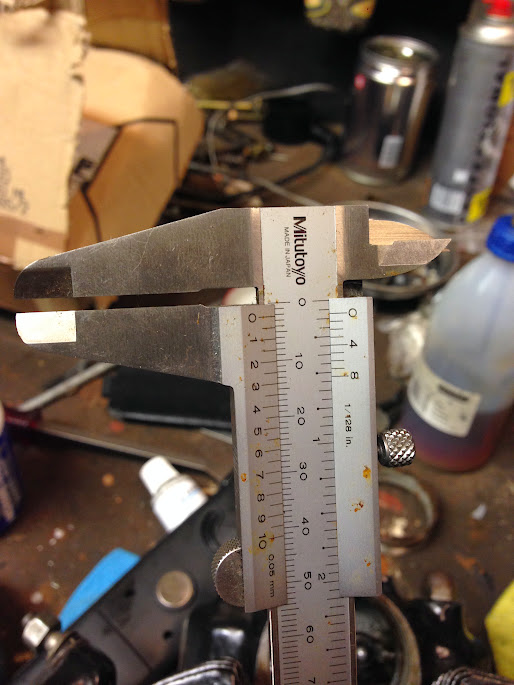
We have been working on the bike steadily for the past few months (almost every wednesday evening). The frame was recently powdercoated along with some custom fenders, engine mounting brackets and some other small parts. The cylinder was bored to approximately 400CC’s and a Honda piston was fitted too match the bore. We’ve begun reassembling the engine and tried to bolt on the cylinder head yesterday when we discovered that the firering (the protruding ring on top of the cylinder base) was higher than the depth of the corresponding groove in the cylinder head (am I still making sense?).

BSA B31 cylinder firering

BSA B31 cylinder firering, 3.2mm

Firering measures approximately 3.2mm

Firering measures approximately 3.2mm

Groove in cylinder head measures approximately 2.3mm

Groove in cylinder head measures approximately 2.3mm

So either we have the head machined or the ring on the cylinder skimmed….

Update: 22-sept-2014

Well, as it turned out, we were wrong in thinking that the fire ring on top of the cylinder barrel should stick all the way into the groove in the head. That ring and the corresponding groove actually form the mating surface. So we put a bit of coppergrease on it and reassembled the engine.

BSA B31 engine reassembled with Mikuni carb and open airfilter

BSA B31 engine reassembled with Mikuni carb and open airfilter

The engine is completely overhauled with new bearings and bored to 400CC’s. We also decided to invest in a more reliable oilpump made by ABSAF in Appingedam (Netherlands) and a new sump plate with magnetic drainplug by SRM Engineering.

SRM sump plate for BSA pre-unit singles

SRM sump plate for BSA pre-unit singles

ABSAF oil pump

ABSAF oil pump

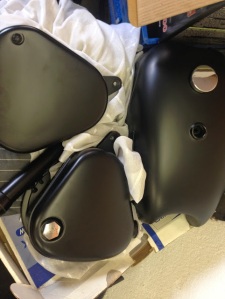
As we were reassembling the engine, the paint work on the tanks, toolbox and front fork was also finished. Very awesome job!

BSA fueltank, oiltank and toolbox in matte black

BSA fueltank, oiltank and toolbox in matte black

Time to start rebuilding the bike!

We had some difficulties with the assembly of the front fork (new bushes and oil seals), and later more difficulties with the swingarm silent blocs. The silent blocs are 2 pair of bushings that fit into the swingarm with rubber in between the 2 bushes. The problem was that we forgot about them when the swingarm went away with the rest of the frame for powder coating. So when the frame and swingarm went into the oven to finish the powder coating, the rubbers vaporized, so we had to replace them. At first we thought the biggest problem was to get to outer bushes out of the swingarm, but we later realised that it was almost just as hard getting the new ones in 🙂 We finally managed to get them in using a hydraulic press and sawing a few millimeters off the ends (because we couldn’t get them in any further).

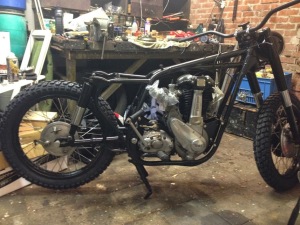
By now we have the engine and gearbox back in the frame, and both front fork and rear swingarm installed together with the wheels.

BSA B31 Brat Style

BSA B31 Brat Style

For more pictures and comments on our first project, check out: https://plus.google.com/photos/105887025148501656794/albums/5908950495416198897


Harley Davidson Shovelhead Barnet Clutch Installation

2013/11/12

Haven’t been posting much lately, but I didn’t sit still all this time 🙂

If you would like to check my photo-log of the installation of a Barnett Scorpion clutch on my ’81 Harley FXS, please check here: https://plus.google.com/photos/105887025148501656794/albums/5932346697772510113

Barnett Scorpion Clutch on a Shovelhead

Barnett Scorpion Clutch on my Shovelhead


2013/03/28

Yup, het was weer mooi! 🙂

Slijterij Frans Muthert / DramTime

Afgelopen zaterdag avond bevond ik mij, wederom als officieuze vertegenwoordiger van Slijterij Frans Muthert en Dramtime.nl, voor de 8ste keer in Der Aa-Kerk in Groningen voor tevens de 8ste editie van het Whisky Festival Noord Nederland. Nu lieg ik natuurlijk een beetje, want de eerste editie in 2006 vond plaats in het Martini Plaza. Maar in ieder geval was het de 8ste editie van WFNN, een bronzen jubileum dus!

Zoals de afgelopen jaren de gewoonte gingen we met het openbaar vervoer, en wel lijn 28 van Stadskanaal naar Gieten en dan verder met Qliner 300 naar Groningen. Uiteraard waren we een klein uurtje te vroeg, want er zou eerst falafel gegeten worden bij Egyptisch eethuis Cairo in de Peperstraat, wij zijn nu eenmaal gewoontemensen.

Na een ijzige wandeling over de Grote Markt en de Vismarkt sloten we aan in de rij voor Der Aa-Kerk. Met een gevoelstemperatuur buiten van zo’n 10…

View original post 857 more words


Mijn tweede keer…

2012/10/05

This slideshow requires JavaScript.


Afgelopen week ben ik als officieuze vertegenwoordiger van topSlijter Frans Muthert samen met enkele andere slijters uit het land naar Schotland geweest. Mijn tweede bezoek aan dit prachtige whiskyland! Deze keer ging de reis naar het Schotse eiland Islay. Voor een echte ‘peatlover’ als ik is dat het whisky-walhalla.

Islay is een eiland dat behoort tot een eilanden groep die we de Binnen-Hebriden noemen, deze Binnen-Hebriden liggen aan de westkust van Schotland. Het eiland heeft ongeveer 3000 inwoners en beschikt over 8 nog actieve distilleerderijen.

De trip was georganiseerd door Nederlandse whisky-importeur Bresser & Timmer, die o.a. de Nederlandse importeur is van Bruichladdich (1 van de 8 Islay Distilleries), maar ook enkele mooie onafhankelijke bottelingen in hun assortiment heeft.
We vlogen vanaf Schiphol op Glasgow waar een busje was gehuurd. Met 8 man in een busje reden we (helaas met een omweg van bijna een uur) van Glasgow naar Tarbert waar we overnachten in het Stonefield Castle Hotel. Tot dan toe hadden we nog steeds niets van dit prachtige deel van Schotland gezien, wat de verassing de volgende ochtend des te groter maakte. Het kasteeltje lag vlak aan de kust en leek met het kleurrijke omringende herfstlandschap wel een schilderij.

Na een typisch Schots ontbijt met eieren, bacon en toast lieten we het schilderachtige Stonefield Castle achter ons op weg naar Port Kennacraig, waarvandaan de veerboot naar Port Ellen (Islay) vertrok.

Read the rest of this entry »


Mijn eerste keer….

2012/06/18

…in Schotland

Sinds ik zo’n jaar of 7 geleden ben begonnen met het drinken van whisky kriebelde het geregeld om zelf eens naar Schotland te gaan om de plaatsen en de mensen te bezoeken die dit prachtige gerstenat distilleren. Onlangs kwam een goede collega, Maarten, met het briljante voorstel om met een groepje ons mooie buureiland te gaan bezoeken. Maarten is zelf ook fervent whiskyliefhebber, en vreemd genoeg zijn er de laatste paar jaar behoorlijk veel van mijn collega’s ook whiskyliefhebber geworden. (e.e.a. zou iets te maken kunnen hebben met de proefmonsters die ik zo nu en dan meeneem naar kantoor 😉 ).

Na een korte mailwisseling hadden wel al snel 7 of 8 liefhebbers, waarvan sommige geen toestemming kregen van de vrouw en een ander rond de geplande datum vader zou worden. Uiteindelijk bleven er 5 mensen over, en dus vertrokken Maarten, Karel, Erwin, Matthijs en ik op 6 juni jongstleden naar Schiphol om van daar uit met vlucht KL1445 naar Aberdeen te vertrekken voor ons eerste bezoek aan whiskyland Schotland!

Vanaf Aberdeen vertrokken we in onze gehuurde BMW X5 naar Lossiemouth, een klein plaatsje dat vroeger de haven van het nabij gelegen Elgin was. In Lossiemouth had Maarten 2 kamers geboekt in het Stotfield Hotel. Nu hoor ik jullie denken, “5 man, 2 kamers? hmm…” Inderdaad, gelukkig had ik oordoppen mee 😉 Maar eerst moest er gegeten en gedronken worden (dat eerste iets meer dan het tweede), en dat is naast whisky iets wat ze in Groot Brittanie ook heel best kunnen: Bier brouwen!! En zonder schuimkraag, dus meer bier!

Op donderdag ochtend verlieten we het Stotfield Hotel en gingen op zoek naar de eerste pagode‘s, want waar een pagode is, is een distillery. De eerste distillery die we hebben bezichtigd was Speyburn. Helaas alleen van de buitenkant, want Speyburn is niet open voor bezoekers. Vanaf Speyburn in het plaatsje Rothes reden we oostwaarts langs de Auchroisk Distillery naar Keith, want ik had gelezen dat daar 1 van de oudste en mooiste distilleries van Speyside staat.

Strathisla
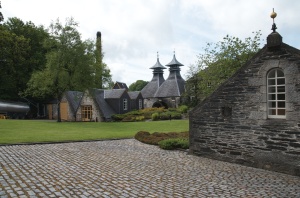
Strathisla Distillery

Strathisla Distillery

Strathisla is opgericht in 1786, althans toen kregen ze een vergunning, ze stookten al lang daarvoor whisky! De distillery is tegenwoordig eigendom van Chivas Brothers (welke op hun beurt weer onderdeel zijn van Pernod Ricard) en is tevens de belangrijkste single malt voor hun Chivas Regal blends. Slechts een paar procent van de totale hoeveelheid whisky wordt als single malt gebotteld, de rest gaat in de blend. (Wat overigens een erg fijne blend is!) Na een interessante tour van de distillery door een oudere, moeilijk verstaanbare Schotse man reden we naar Glenfiddich met een tussenstop bij Balvenie Castle.

Balvenie Castle

Balvenie Castle

Onze tour bij Glenfiddich begon pas om 15:00 uur, dus we hadden eerst wat tijd te doden. Dit deden we onder het genot van een stevige lunch en een paar ‘pints’ Tennent’s Lager in de plaats Aberlour aan de rivier de Spey. Deze plaats is overigens ook de thuisbasis van Aberlour Single Malt!
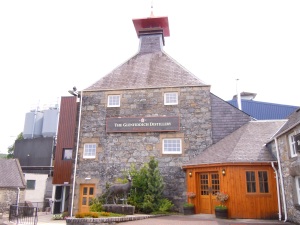
Glenfiddich Distillery en Pagode

Glenfiddich Distillery en Pagode

De tour bij Glenfiddich was erg indrukwekkend, waar Strathisla beschikt over 2 wash stills en 2 spirit stills, heeft Glenfiddich 8 wash stills of Low Wine stills en 5 spirit stills!

Nog even een korte uitleg over het productieproces van whisky. De gerst wordt eerst geweekt in warm water zodat de gerst begint te ontkiemen. Hierdoor worden de nodige aminozuren geactiveerd die later de zetmeel moeten omzetten in suikers. Vervolgens wordt dit proces gestopt door de gerst op een moutvloer te laten drogen, deze moutvloer wordt van onderen verwarmd. Traditioneel gebeurde dit met een kiln (oven) waarin een turfvuur werd gestookt. Tegenwoordig wordt veelal hete lucht gebruikt voor het droogproces. Vervolgens wordt de gemoute gerst gemalen tot een grof soort muesli, genaamd grist.

De grist gaat in een grote mash tun waar er heet water aan wordt toegevoegd. Dit gebeurt 3 a 4x met water van verschillende temperaturen oplopend van ca 63 tot 95 graden celcius. Tijdens dit proces worden de zetmelen in de gerstekorrels omgezet in suikers die we nodig hebben om alcohol te maken. Het resultaat noemen we wort. Het wort wordt overgepompt naar de washbacks waar gist wordt toegevoegd. Tijdens het gisten worden de suikers omgezet in alcohol en CO2. Aan het einde van dit gistings process hebben we een soort bier van 8% alcohol waarmee we gaan distilleren, want 8% is natuurlijk niet genoeg!
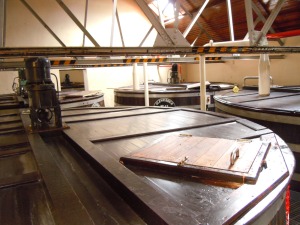
Glenfiddich washbacks

Glenfiddich washbacks

Het alcoholhoudende wort wordt naar de wash/low wine still’s gepompt voor de eerste distillatie. Bij distillatie wordt gebruik gemaakt van het verschil in kookpunt tussen water en de verschillende soorten alcohol. Water kookt pas bij 100% celcius, maar alcohol begint al rond de 65% te verdampen. Overigens is dat niet de alcohol die we willen, pas rond de 78 graden begint de ethanol te verdampen, daarvoor krijgen we voornamelijk methanol wat niet zo gezond schijnt te zijn. Het eerste deel (head) van het distillaat wordt dan ook naar een speciaal vat gebracht om later opnieuw te worden gedistilleerd. Vanaf zo’n 78 graden begint ‘the good stuff’ (heart) uit de still te vloeien, dit noemen we low wine en heeft een alcohol percentage van rond de 20%. Het laatste deel van de distillatie (tail) voldoet ook niet aan onze eisen en wordt samen met het eerste deel opnieuw gedistilleerd. De middenloop gaat naar de spirit still waar het een 2de keer wordt gedistilleerd. Aan het einde van de 2de distillatie hebben we een ‘spirit’ met een percentage ergens tussen de 65 en 70% alcohol. Dit wordt verdund tot ongeveer 64% en op eikenhouten vaten overgebracht om tenminste 3 jaar te rijpen. Bijna alle kleur, geur en smaak komt van de rijping. Rijping geschiedt op verschillende soorten vaten, vaak worden ex-Bourbon vaten gebruikt, maar ook vaak sherry of port vaten. Bourbon vaten zorgen voor o.a. vanille tonen waar sherry vaten voor meer rijpe fruit tonen en caramel zorgen.
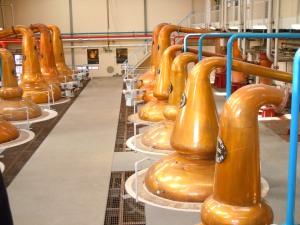
Glenfiddich Still Room

Glenfiddich Stillroom

Uiteraard was er na afloop van de rondleiding nog een Glenfiddich Nosing & Tasting, waarin we respectievelijk de 12 y.o., 15 y.o. Solera Reserve, 18 y.o. en 21 y.o. hebben geproefd. Voor mij was de Glenfiddich 18 y.o. absoluut de winnaar met mooie aroma’s van gedroogd fruit, noten, caramel en honing.

We zouden overnachten in een B&B in Fort Augustus nabij Loch Ness, echter hier was de boeking niet doorgekomen en ze hadden dan ook geen plaats voor 5 kerels in een BMW X5. Terug in het dorp vonden we gelukkig een zeer goedkoop youth hostel en uiteraard een pub voor de nodige pints en drams!

Vrijdag ochtend stonden we vroeg op om onze reis voort te zetten naar Isle of Skye en Talisker!
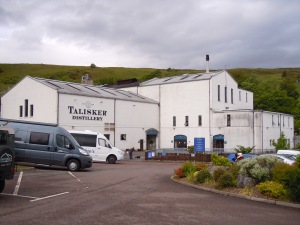
Talisker Distillery, Isle of Skye

Talisker Distillery, Isle of Skye

Eindelijk turfrook en maritieme invloeden! Begrijp me goed, die Speyside whisky’s met delicate zachte vanille, honing en fruit aroma’s zijn prachtig, maar aan het einde van de dag verlang ik dan toch weer naar een zware rokerige whisky en daarvoor zijn we bij Talisker aan het juiste adres! Ivm met een aanhoudende droogte op Skye werd er momenteel niet gedistilleerd (te weinig water), maar desondanks kregen we toch weer een interessante tour en tasting!

Die middag hadden we een flinke klim op het agenda staan in het prachtige berglandschap van Skye. De ruim 3 uur durende wandeling was een ware hel voor IT-nerds als ons, maar absoluut de moeite waard!
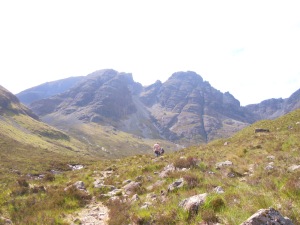
5 idiots walking in the mountains of Isle of Skye

5 idiots walking in the mountains of Isle of Skye

Zaterdag hebben we tot slot nog een bezoek gebracht aan Dalwhinnie in de Hooglanden op onze lange weg terug richting de oost kust.
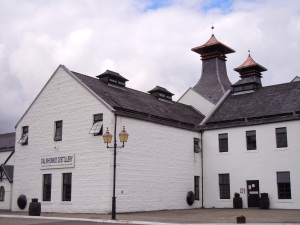
Dalwhinnie Distillery

Dalwhinnie Distillery

Oh ja, zondag morgen op weg terug naar Aberdeen airport ook nog ff een kasteeltje meegepikt…
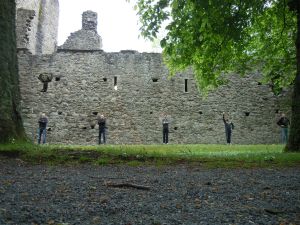
The 5 knights (idiots) Huntly Castle

The 5 knights (idiots) of Huntly Castle

Een kort, maar geweldig bezoek aan whiskyland Schotland! Ik von’t mooi!

Enrico Klein


Terugblik op een geslaagde voorjaarsproeverij!

2012/04/17

Terugblik op een geslaagde voorjaarsproeverij!.


primitivetechnology.wordpress.com/

Making stuff from scratch in the wild

Slijterij Frans Muthert / DramTime

Slijterij - Wijnhandel - Whisky Specialist

Tom-Roderick Muthert Business Blog

a gathering of the business world

GJR's Whisky Blog

Blog site for whisky reviews and more !

enricoklein.wordpress.com/

To boldly go where ever the fuck I wanna go!